
how to clean a vegetable chopper properly

Learn simple and safe steps to keep your kitchen tool fresh and hygienic. This guide explains how to clean a vegetable chopper properly with easy daily and deep cleaning methods for long-term use.
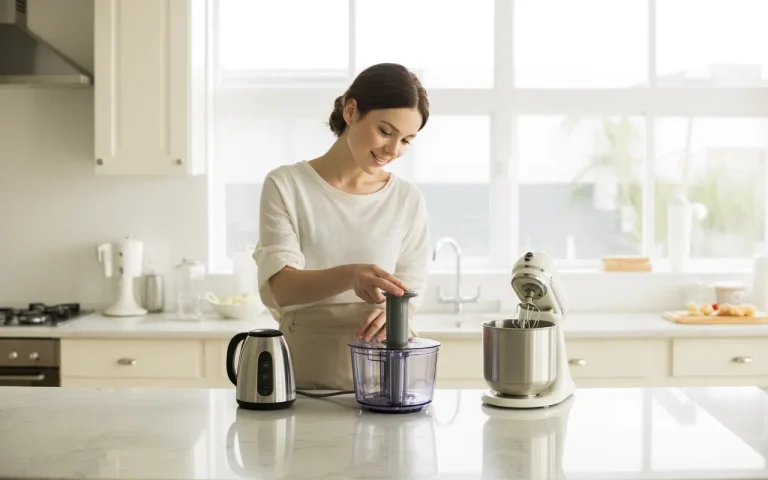
Keeping kitchen tools clean is part of healthy cooking. A vegetable chopper touches fresh produce every day, so it needs care and regular cleaning. Many people rinse it quickly and move on, but that often leaves food bits behind. This guide explains how to clean a vegetable chopper properly with clear steps that work for daily use and deep cleaning. The goal is to help you stay safe, save time, and make your chopper last longer.
Cleaning does not need fancy products or long routines. With warm water, mild soap, and a few minutes, your chopper can stay fresh and odor free. The steps below are based on real kitchen use and common chopper designs. You can follow them even if you are busy or new to cooking.
“A clean tool is the first step to clean food.”
Author: Maria Lewis, Home Cooking Writer

Why Cleaning a Vegetable Chopper Matters
A vegetable chopper cuts raw produce that may carry dirt and germs. Small pieces often get stuck under blades or inside lids. If left there, they can grow bacteria and cause bad smells. Over time, this can affect taste and safety. Learning how to clean a vegetable chopper properly also protects the blades. Clean blades stay sharp longer and work smoothly. This means less effort while chopping and fewer chances of slips or cuts.
Clean tools also show good kitchen habits. Whether you cook for family or guests, hygiene builds trust and comfort in your food.
Parts of a Vegetable Chopper You Must Clean
Most vegetable choppers have similar parts. Each part needs attention during cleaning.
Common Chopper Parts
| Part Name | Why It Needs Cleaning |
|---|---|
| Blades | Hold food bits and moisture |
| Lid or cover | Traps steam and residue |
| Container bowl | Collects chopped vegetables |
| Rubber base | Holds dirt and spills |
Ignoring one part can lead to odor or stains later. Always separate parts before washing.
How to Clean a Vegetable Chopper Properly After Use
Daily cleaning keeps things simple. Do this right after chopping.
First, take the chopper apart carefully. Remove blades with care to avoid cuts. Rinse all parts under running water to remove loose food. Use warm water, not hot, to protect plastic parts.
Next, add a drop of mild dish soap to a soft sponge. Gently scrub each part, especially corners and blade edges. This step is key to how to clean a vegetable chopper properly on a daily basis.
Rinse well to remove soap. Shake off excess water and place parts on a clean towel to air dry. Avoid stacking wet parts, as trapped moisture causes smell.
Deep Cleaning for Weekly Care
Even with daily washing, choppers need deeper care once a week. This removes stains and hidden residue.
Simple Deep Cleaning Methods
| Method | Best For |
| Baking soda paste | Removing stains |
| Vinegar soak | Odor removal |
| Soft brush | Blade grooves |
To deep clean, mix baking soda with water to make a paste. Apply it to stained areas and let it sit for ten minutes. Scrub gently and rinse.
For odor, soak parts in water with vinegar for fifteen minutes. This step helps with how to clean a vegetable chopper properly when smells appear.
“Small habits in the kitchen protect health every day.”
Author: Daniel Cooper, Food Safety Educator

Cleaning Blades Safely Without Injury
Blades are the most risky part. Always clean them with care.
Hold blades by the dull side if possible. Use a soft brush or sponge, not your fingers, to clean sharp edges. Move in one direction to avoid slips.
Never leave blades soaking where you cannot see them clearly. This rule is often ignored, but it matters for safety and proper care.
Dry blades right away to prevent rust, especially if they are metal. Safe blade care is part of how to clean a vegetable chopper properly without harm.
Mistakes People Often Make
Many people think a quick rinse is enough. This leaves oils and tiny bits behind. Another mistake is using harsh scrubbers that scratch plastic parts.
Do not use strong chemicals or bleach. These can damage surfaces and leave smells. Dish soap and natural cleaners work well.
Putting parts away while wet is another issue. Moisture leads to mold. Let everything dry fully before storage.
How Often Should You Clean Your Chopper
Clean after every use. This keeps food fresh and safe. Deep cleaning once a week is enough for most homes.
If you chop strong smelling items like onions or garlic, clean right away. This habit supports how to clean a vegetable chopper properly without extra effort later.
Storage Tips After Cleaning
Store the chopper in a dry place. Keep blades covered or in a case if available. This avoids dust and accidental cuts.
Do not store near heat or sunlight. Plastic parts can warp over time. Proper storage completes the cleaning process.
“Care for tools, and they care for your meals.”
Author: Helen Brooks, Kitchen Skills Trainer

Frequently Asked Questions
Can I put my vegetable chopper in the dishwasher?
Some parts may be dishwasher safe, but hand washing is safer. It gives better control and supports how to clean a vegetable chopper properly without damage.
What if my chopper smells bad?
Soak it in warm water with vinegar for fifteen minutes. Rinse and dry well.
How do I remove stains from plastic parts?
Use baking soda paste and a soft sponge. Avoid hard scrubbers.
Is it safe to use lemon for cleaning?
Yes, lemon helps with odor and light stains. Rinse well after use.
Conclusion
A clean vegetable chopper keeps your kitchen safe and your food fresh. With daily washing and simple weekly care, you avoid odors, stains, and germs. The steps shared here focus on real kitchen habits that work for everyone.
Once you learn how to clean a vegetable chopper properly, it becomes second nature. A few minutes of care protects your health, saves money, and keeps cooking enjoyable. Clean tools make cooking feel calm and confident every day.
Related posts
 Which kitchen gadgets save the most time
If you are wondering Which kitchen gadgets save the most time, the clear answer includes food processors, air fryers, pressure cookers, electric kettles, and dishwashers that…
 What kitchen tools do professional chefs use at home
Many home cooks ask what kitchen tools do professional chefs use at home, and the answer is simple: sharp chef’s knives, cast iron pans, stainless steel…
 Biolomix Kitchen Food Stand Mixer
Looking for a reliable mixer for daily baking? The Biolomix Kitchen Food Stand Mixer offers strong mixing, multiple speed levels, and easy cleaning, making it a…